
Now that waterproof digital cameras are pretty common among Noosa Yakkers, many still (ie non-video) pics of great kayak fishing interest are being recorded and passed on by email. We still get many queries about how best to prepare a digital still image (henceforth in this article called “photo”) for emailing and for the blog, so this post has been created to help you master the necessary skills to manipulate your images and hence successfully pass the photos on to the group.
DIGITAL IMAGES & PIXELS
At the very start, you need to be aware that the devices (PCs, tablets, smart phones) which display your photo use PIXELS, not mm or inches, to determine how much space the photo uses on its screen. You also need to understand that most devices can effectively use a maximum of up to about 1600 pixels wide as that is the maximum number of pixels which can be displayed in width on the device (Note that a typical basic notebook computer has a display width maximum of 1024 pixels, as do most tablet computers such as iPad).
All of this means that, when display of the full photo on a typical screen is the objective, any pixels more than 1600 pixels width in the image are wasted. A photo which is 4000 pixels wide will still be displayed (in some cases not all at once -- you'll have to use a scroll bar to see the whole width), but the vast majority of pixels are unused in a full screen display. This also means that most of the considerable band width (ie your broadband, which you’re paying for) and extra time consumed by transmitting and receiving the 4000 pixel image are wasted. Time, money, storage space, all wasted by anyone who sends or receives photos which are wider than absolutely necessary!
APPLICATION DISPLAY LIMITATIONS
Not only do display devices have maximum display widths, but so also do some applications (such as web pages). Given that many of Noosa Yakkers’ photos will hopefully end up in Trip Reports, and/or in Our Favourite Pics, it makes sense that the yakker providing the photo in the first place should prepare that image for that purpose before sending it on.
IT’S EASY, SO DON’T GIVE UP NOW
Once the limitations are understood, the process of optimizing the photo for the display device is easy. All users of Windows 7 and Windows Vista have a built in application which will allow you to do this. If you have an iPad there’s a great and low cost App called Photogene which you should install. Mac owners have a program called Preview which allows the adjustments needed to be made easily.
As statistics show that most views of our web pages are by Windows users, I’ll use the Windows 7 built in software “Paint” as the means of demonstrating how to optimize your pictures. But before going on with that, here are three basic rules for Noosa Yakkers photos you wish to send by email or post on the blog.
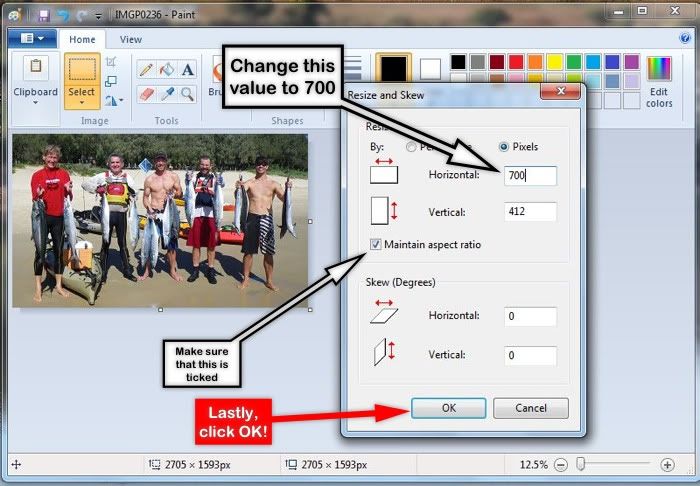
RULE #1: MAX WIDTH 700 PIXELS
Whether you’re intending your photos to be viewed only in an email or intend that they be displayed on the Noosa Yakkers blog you don’t need photos which are wider than 700 pixels. This is because 700 pixels will display very well in an email and is the LARGEST size which will fit the available width on any of our blog posts.
RULE #2: CROP YOUR ORIGINAL PHOTO TO GET THE BEST OUT OF IT
Most photos have stuff that can be cropped out (demonstrated below). The cropping (usually a process of selecting a rectangular shape on the photo and keeping that part of the photo, discarding the rest) should be done on the ORIGINAL photo, before resizing, because that process will give the maximum photo quality for number of pixels, and thus display quality will be optimized.
Note also that photos which are 700 pixels wide but a lesser number of pixels deep (eg 700x250) will always display better on typical display devices than photos which have more depth than width. Sometimes, however, you must use photos that are deeper than they are wide, as in photos of the Eiffel Tower, for example.
RULE #3: ALWAYS KEEP AN UNTOUCHED COPY OF YOUR ORIGINAL PHOTO IN CASE YOU STUFF UP
One of the simplest ways of doing this is to NOT delete the photos from your camera/card when you transfer them to your computer. (They can always be deleted later, when you’re happy you have the originals stored safely.) ALWAYS save your modified photos to a different folder and file name than your original after you’ve cropped and resized them. That way you’ll be able to find them easily when you want to email them, and you’ll still have the originals stored on your computer, in a different folder, for safekeeping.
HOW TO CROP AND RESIZE PHOTOS
Firstly, always save the photos to your computer otherwise you take the risk of modifying photos on your camera/card and therefore destroying the originals. You can ensure this is the case by disconnecting the camera/card from the computer before starting to edit the photos. It’s always best to create a new folder for your fishing photos and store your photos in there (in subfolders named for the date they were taken, if you’re really well organized).
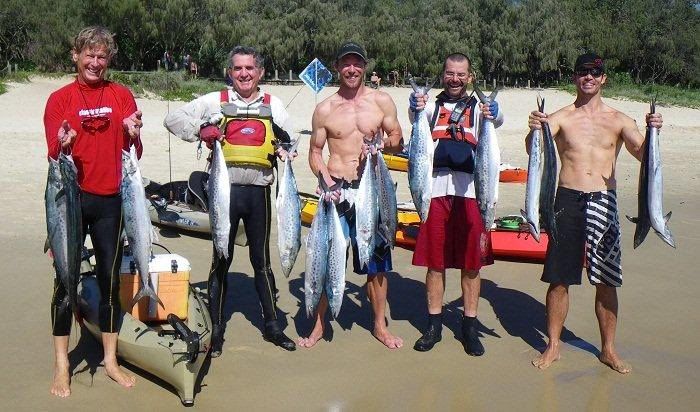
Here's the photo we’re going to use as an example for cropping. It’s an old favourite...
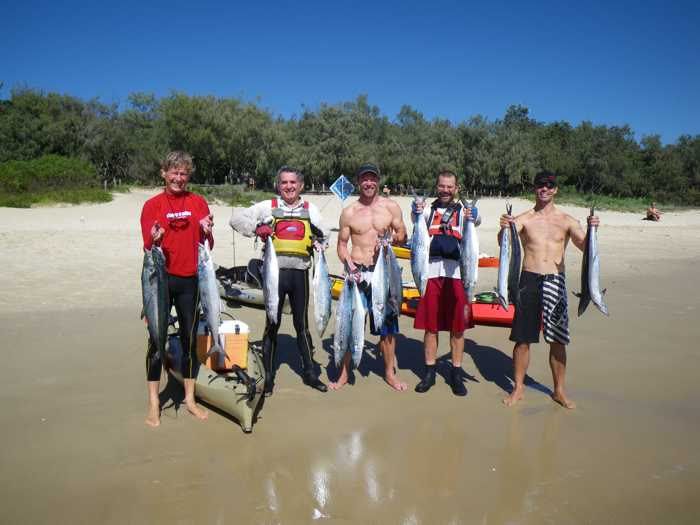
This photo’s original size is 3648x2736 pixels (in order to show you the whole photo in this space I’ve had to reduce this copy to 700x525 pixels). The original photo requires 3.2mb of storage space, while the smaller version, as displayed above, requires only 55kb, about 1/60 of the original!
You will see that in the subject photo there’s a lot of “empty” space around the subject. We could display this photo a lot better if we could get rid of this space, and that’s exactly what we’re going to do.
The Windows program which allows us to do this is called “Paint” and it can usually be found under Accessories in the Program list.
Start “Paint”, and open the file. You can do this with some sample files provided or with any other suitable file on your computer.
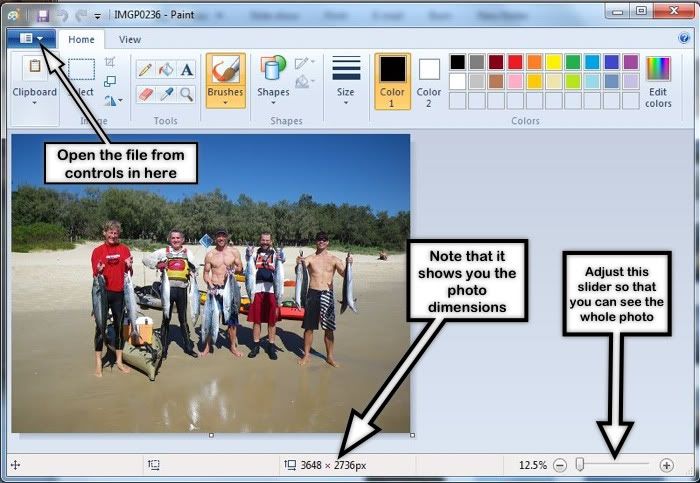
The view after opening. Note that the actual tools/items displayed in the upper tool bar and in the information bar depend on the overall window width, so adjust if necessary. The annotated notes in B&W are mine.
Now we’re going to crop the photo, to get rid of the stuff we don’t want.
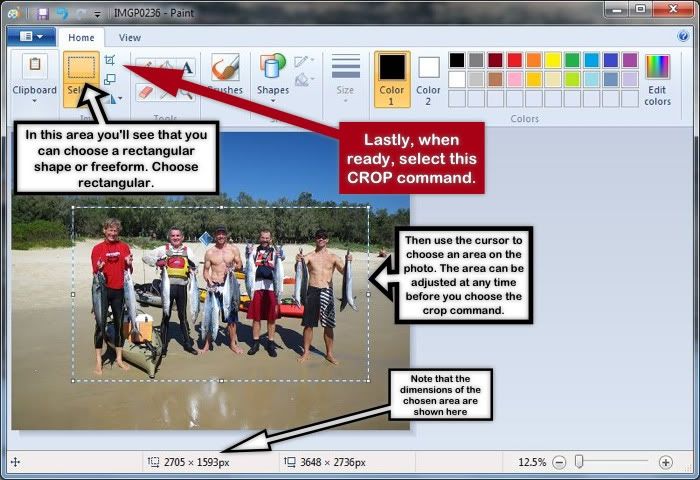
After you choose CROP, the photo will display as below:
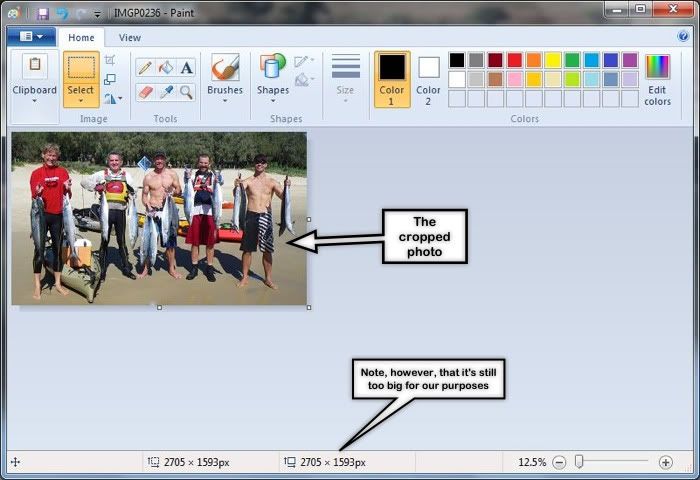
OK, nicely cropped, but still too big. Now to resize it.

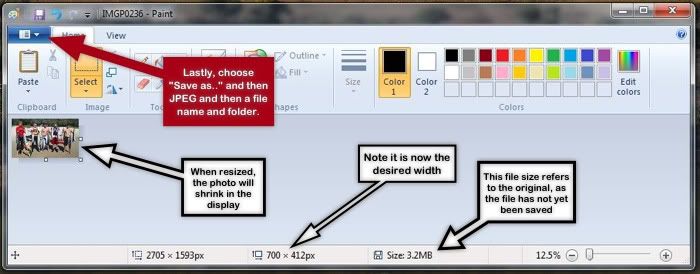
Nicely done! Now the final step after resize...
Now let’s compare the two pics, the original, uncropped, and the cropped version, with both at 700 pixels wide
Above, the original, uncropped
The cropped version, much better, I think you'll agree
So there it is, easy as! But please make sure you select the cropped and downsized versions of your pics before sending to us. If anyone's having difficulties, please get in touch with me.
Sunshiner
No comments:
Post a Comment